Desktop Client

Overview

This documentation is aimed at customers who wish to perform address capture via a standalone desktop application. If you require an embedded solution, then please refer to our service APIs.

  • Utilises Hopewiser’s Address Lookup service to provide an easy method for address capturing.
  • Search on either an incomplete address or postcode and send the results to another application.

For further information, the program contains full online help and includes a printable PDF manual as part of the installation which you can download here

Quick Start

Step 1

Download the FastAddressClient application from here or from our portal by registering for a FREE TRIAL

Step 2

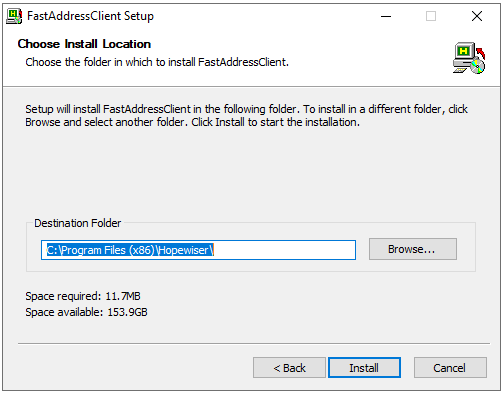
Run FastAddressClientSetup.exe and follow the setup instructions, choosing the default options, until the installation is complete.
Step 3

The first time you run FastAddressClient you will be prompted to sign in to Address Lookup. You can also access the Sign in window from the Settings menu.

Create a token in the Portal and enter its username and password, then click the Sign In button.
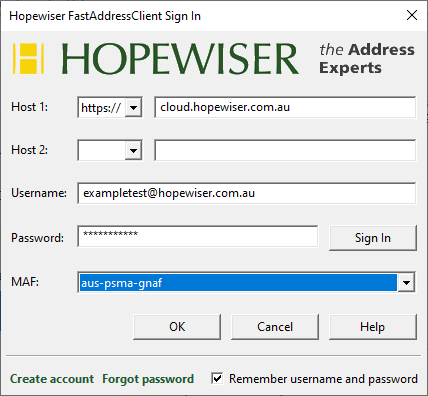
You should then select the Master Address File (MAF) you wish to use and click OK. The aus-psma-gnaf MAF is the dataset for which free clicks were created during registration. If you purchase a different dataset, then you will need to select it here.

An appropriate error message will be displayed if the sign in fails (please refer to the “Common errors” section below for more details).

Step 4

From the FastAddressClient home page use the AutoComplete search, by selecting the option in the menu, offering matches for a given query string ‘as you type’.

Select the appropriate item from the Possible Matches text box, by double clicking on the item text. When a complete address is reached it will be displayed in the Completed Address text box.
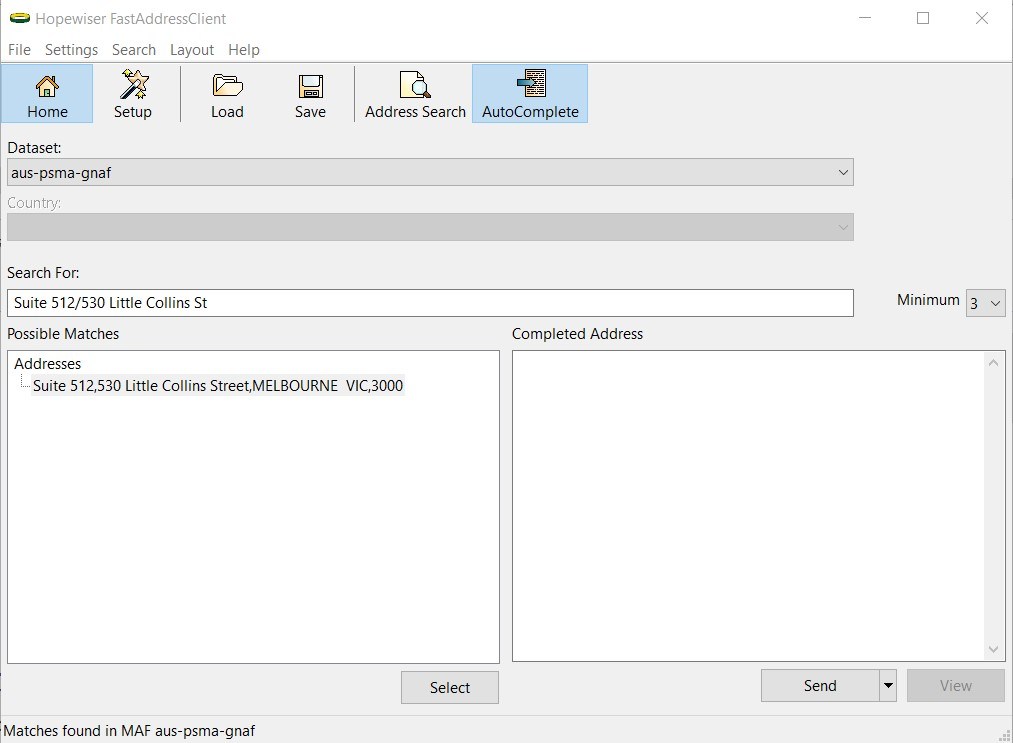
Alternatively, you can use the Address Search, by selecting the option in the menu, offering the ability to enter the required search criteria and clicking the Search button, if this is your preference.

If you are using the International dataset use the Country drop-down to select the country of the adderss you are looking up.

Customising

How do I send address fields to another application?

FastAddressClient is installed with a predefined SendKeys configuration that will send address labels to the foremost window with each element output on a new line.

This section covers a step-by-step guide to setting up the SendKeys functionality. It sends keys to Notepad as a demonstration. Sending to other applications simply requires substituting the appropriate target window and key combinations for navigating between fields.

First, start an empty Notepad. You should have a screen such as the following:

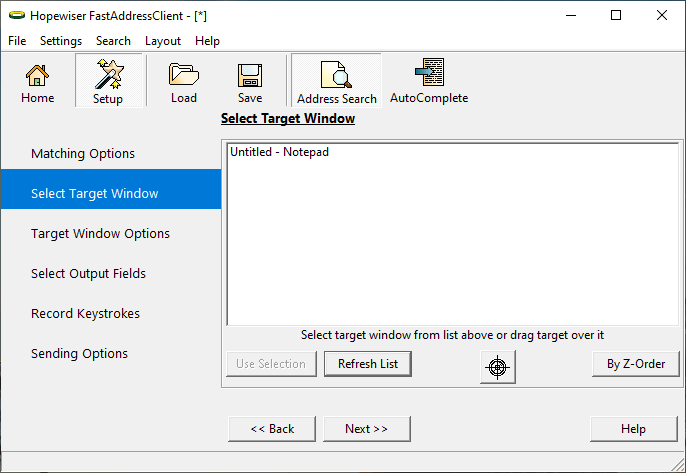
Return to FastAddressClient, click the Setup icon in the toolbar and then click the Select Target Window link from the left hand options.

Select the window you wish to send the address fields to. In this case toggle the By Z-Order/By Title button so that Untitled – Notepad is displayed and select it, then click the Next >> button.

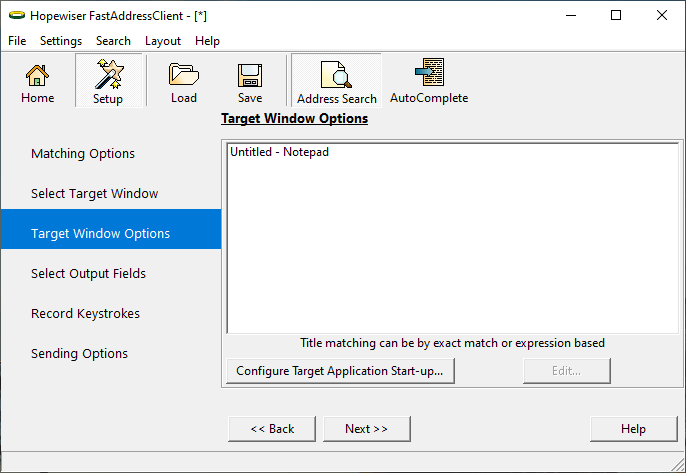
If you wanted to, you can now choose to start the target application each time address fields are sent to it by clicking the Configure Target Application Startup… button (Please refer to the online help for further information).

Click the Next >> button.

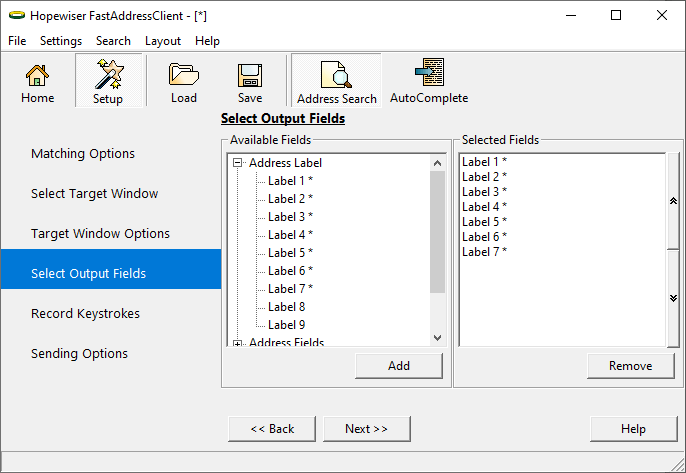
Choose the fields that you would like to send to the target application. For the demonstration we will choose to send the address label and the UDPRN.

Click the Next >> button.

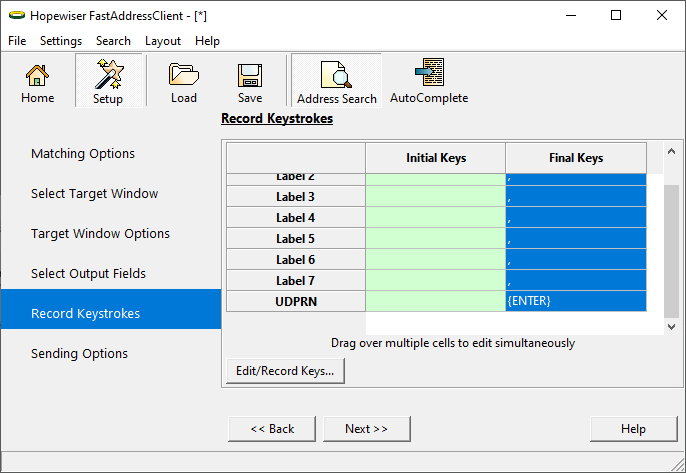
This page allows you to specify key strokes that are applied between each output field, such as tabs to navigate the cursor within the target application. For demonstration purposes we will change the predefined configuration to place a comma between each field.

Highlight the Final Keys column for all fields except the final UDPRN field, then click the Edit/Record Keys… button.

Click the Clear All button, enter a comma and then click the OK button.

If the Final Keys value for the UDPRN field is not {ENTER}, then highlight the value, click Edit/Record Keys.. and repeat the above actions entering a carriage return instead of a comma.

When finished the page should look similar to that shown above.

Click the Next >> button.

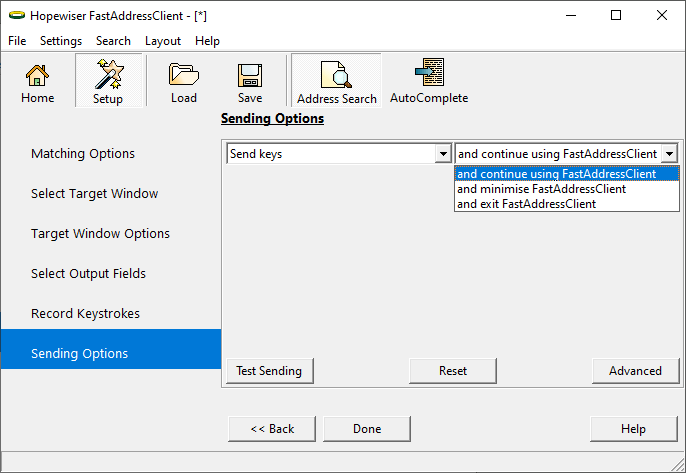
Next, choose what you want FastAddressClient to do after an address has been sent. You may select to close FastAddressClient after sending an address for example, then click the Done button.

Finally toggle the Send/Copy/Copy and Send button to specify a Send button, by clicking on the button and selecting Send from the available options.

The previous image shows a captured address ready to be sent to Notepad.

When you have matched an address click the Send button to send the address fields to the target application, in this case Notepad. The address fields will be sent to Notepad as seen in the image below.

Common errors

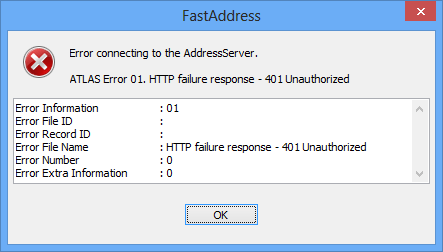
The most common problem is “401 Unauthorized” which indicates that an invalid token username or password was entered:

fastaddressclient-error-401

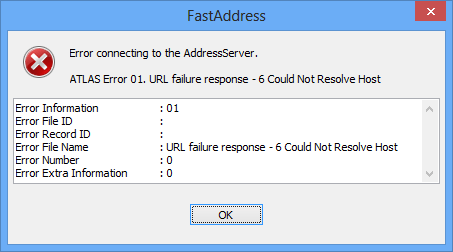
A “Could not resolve host” error indicates an incorrect Host has been entered (and no such host exists):

fastaddressclient-error-unresolved-host

A “404 Not Found” error indicates an incorrect Host has been entered (it does exist but does not understand Address Lookup requests):

fastaddressclient-error-404

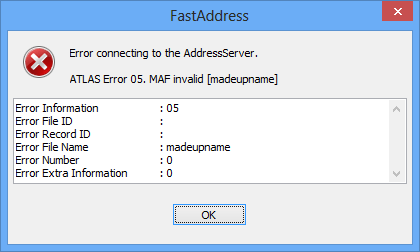
A “MAF invalid” error indicates that an incorrect or unavailable value was used for the Dataset. Check that the user has permission to use the dataset:

fastaddressclient-error-invalid-maf

Any other errors are likely to be related to your firewall and/or proxy setup. Searching for the final part of the message online may help, alternatively email the support team with your settings and the exact error and they will be happy to help.